
Being poorly prepared because I took the slot only a week before the actual climb. Don't let that happen to you! Read this Ultimate Preparation Guide for Mount Pulag before you climb!
Budget
There are two options for you. And, the main consideration is your budget!
 |
| Above The Clouds Tour Group Meet (0500-0700) at Caltex Station near Victory Liner Station |
Option 1 involves booking yourself in a tour:
- Typical tour inclusions is only for:
- Jeepney (Baguio-Bokod-Ranger-Bokod-Baguio) - pain in the ass literally ;)
- DENR fees (Certificate of conquest)
- Local guide fees (Licensed tour guide from the Pulag National Park)
- Group equipment (stove, cookset, lanterns; we do the cooking!) - Free 1 Lunch
- Facilitators
- Travel Insurance
- Souvenir Shirt
- Tour rates - You can take ours as a sample as all 11 of us were booked in at Adventures Above the Clouds or ClubTravelNOW.org. Our tour rate is:
- 4,088 php - from Manila
- 3,188 php - from Baguio (Our base expense for all 11 of us is 3,188 x 11 = 35,068 php)
- Additional fees:
- 1,000 - ride to and from Manila to or from Baguio (own carpool divided our toll and gas expenses)
- Pros and Cons with Our Mount Pulag Tour Package with Adventures Above the Clouds or ClubTravelNOW.org
- Pros:
- Site is very information on the itinerary, what to bring and some faqs
- We had sight seeing stops at the:
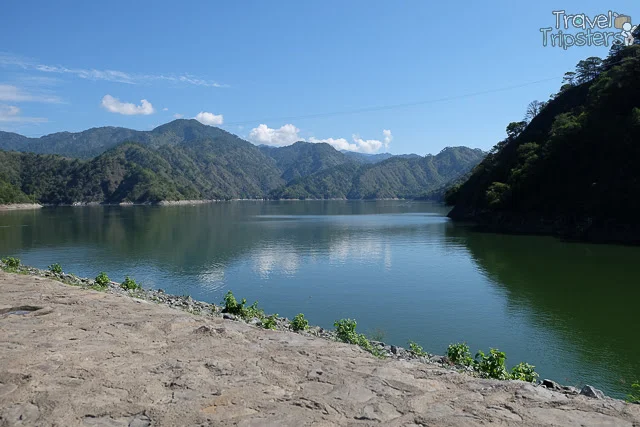 |
| Ambuklao Dam |

 |
| The Spillway |
- Ambuklao Dam and The Spillway in Brgy. Ambuklao, Bokod, Benguet
 |
| 452 meters long (It's longer than it looks) |
 |
| 129 meters high (It's also highest than it looks) |


- Jangjang Hanging Bridge (aka Jangjang-Balengasay Hanging Bridge) in Bokod, Benguet - reach the end so you can see that there is the Jangjang Eatery


 |
| Pinkan Jo Translate to Hi Jo! |
 |
| I highly recommend the Fried Chicken against all the other dishes! We even made another stop back for them! ;) All meals are priced at 50 php and 10 php for rice |

 |
| View at the Back of Pinkan Jo Snack House |
 |
| Toilet is free and clean |
- Pinkan Jo Eatery - Our official stop for brunch, snack and drink replenishment for toilet stop. It also has a stunning view.
- They took note of food restrictions
- July-October is blocked because it is the rainy season - at least they don't give false hopes for this period
- Cons:
- Sizes of the T-Shirts that were distributed were not as we indicated.
- We were misinformed regarding the camp sites and we had to camp at the Ranger Station. We were given a notice that "starting last February 2015, Mt. Pulag park management decided to close camping sites (Camp 2 and 3) in order to help Mt. Pulag recover from all the years/months of intense human activity due to the spike in tourism." but when we got to camp 2 and 3, there were lots of campers there.
- I think our tour is expensive. Although initially you think it's cheap but because we had to add for the bus from manila, full board meals and tent (amounting to around 1,400 addition per person so actual total is 4,588 when you can have an all-in for around 3,350-3,800 if you do your research)
- I expected a more informative tour. Our tour guide didn't talk at all about Mount Pulag during our trek.
- We didn't stop by Daclan Sulfur Spring/Badekbek Sulfur Spring.
- Transportation from Baguio to Ranger Station
- 1. 8,000 php - Rent monster jeep for 18 persons (ETA 3-4 Hours)
- 2. Individual Public Transport
- 120 php/person - van or public bus from Dangwa terminal by the old slaughter house in Baguio to Kabayan (ask to be dropped off at Ambangeg near DENR station) (ETA 2 hours)
- 250 php Habal-habal to Ranger Station
- 225 php/person Orientation fee at DENR Ambangeg
- 30 php cultural fee
- 500 php/guide for 5 persons + 100 additional person - if you can choose a guide get one that's good with cameras. I've observe the other group guides like that =)
- Had we gone this DIY route (8,000 or 8,140 + 2,160 + 1,100 + 330 php = 11,730 php) we would have saved up to 23,478 php!
- Other optional expenses:
- bus trip going to and from Baguio
- 500 php - To hire a porter for up to 15 kilos.
- 15-50 php - For hot powdered drinks and snacks from the stores at the ranger station
- 5 php - For clean toilet or shower
- 350 php - Full board meals (2 Lunch +1 Light Dinner + 1 Light Breakfast) - from above the clouds
- 300 php - 1 tent (good for 2 or 3 persons - kiddie size!)
- 200 - sleeping bags at the ranger station
- May 29 (Friday)
- 0500 - 1000 ETD Baguio to Bokod, Benguet (Monster Jeep)
- 1000 - 1030 Registration and Briefing at DENR Ambangeg
- 1030 - 1200 Ambangeg to Babadac Ranger Station (Jeep)
- 1200 - 1300 Lunch
- 1300 Set camp at Babadac Ranger Station
- 1800 Dinner and Overnight
- May 30 (Saturday)
- 1200 - 1230 Wake-up call
- 0100 ETD from Babadac Ranger Station to Summit (Hike)
- 0500 - 0700 Sunrise at Summit, Photo Ops
- 0730 - 1100 ETD to Babadac Ranger Station
- 1100 - 1200 Lunch at Babadac Ranger Station
- 1200 - 1330 ETD Babadac Ranger Station to Ambangeg (Jeep)
- 1330 - 1700 ETD Ambangeg to Baguio (Jeep)
- Ambuklao Dam and The Spillway
- Jangjang Hanging Bridge (aka Jangjang-Balengasay Hanging Bridge)
- Bajungbong falls
- Daclan Sulfur Spring/Badekbek Sulfur Spring
- Most of my gears are borrowed from my cousin that couldn't go. I'm very lucky as she is very prepared with intensive research and shopping involved. To guide you in layering your clothes, check here http://www.mountain-forecast.com/peaks/Mount-Pulag/forecasts/2922
- Also take note of the season:
- High probability of dry weather: summer (March - May)
- High probability of wet weather: rainy season (June - October) - I also discourage climbing in this season because it will be very moist and muddy.
- Coldest months: December-February - Most of us are not used to the coolness so I really discourage you from taking this climb. Remember my sisters traumatic experience? They went up on a stormy and freezing time and ended up wasting money.
- 1. Main clothing
- 1.1 1 pair of ordinary clothing going up to the Ranger Station
- 1.2 1 pair of layered clothing for hiking up to the summit (Better if thermal. It was 8 Degree Celsius at the Ranger Station when we began to hike up) - Because I'm used to the hot tropical weather I wanted to be sure I won't freeze so I wore excessive layers even though it was summer. It's normal to sweat out during a hike so I'd personally prefer it to freezing!
 |
| My clothes with all the layers! Bonnet, Winter Scarf, Columbia Rain Jacket, Ultrathin Lightweight Polyester Sweater, Uniqlo Ultalight Trim Down Jacket, Black Uniqlo Heatech Sweater, T-Shirt, Body Music Jogging Pants and Reebok Rubber Shoes |
But, I had to trim down as we got up and the sun got up.
 |
| Removed bonnet, winter scarf, black Uniqlo Heatech Sweater and zipped open everything as daybreak came |
 |
| As I hiked down, I trimmed everything down into Black Uniqlo Heatech Sweater, T-Shirt, T-Shirt, Body Music Jogging Pants and Reebok Rubber Shoes (and it was still hot!) |
- 1.3 1 pair after hiking (you can take a bath for a fee at the Ranger Station) - Ordinary clothes are fine because it is warm when the sun is up.
- 2. Fleece/down/shell jacket - If you can, choose the warmest but lightest jacket. I brought a Uniqlo Ultra light weight down jacket and it's light weight didn't bother when I had to trim down.
- 3. Raingear - You'll need this even during summer as it may drizzle or rain. We bought our raingear from Wyler Enterprises. Some of us opted for the 1 piece raincoat and some chose the 2-piece rain jacket and pants. The 2-piece rain jacket and pants are better because they don't get caught on the twigs causing tear. They also don't balloon from the strong during strong winds. Above all, they were moisture-free for a cheap price! They are also light weight and easy to dry. We just hanged them dry outside our tents. If you have more funds, you can go for Columbia or Northface jackets. I was using wearing a Columbia jacket which was light and waterproof and it was efficient in keeping the moisture away.
- 4. Trekking/jogging pants - As long as it can protect you from thorns and twigs, it's good enough. I used my old Body Music nylon jogging pants. It was light weight and easily dries. If you have a high budget you can invest on waterproof or thermal ones. If you have a 2-piece rain jacket and pants, I don't see why you need waterproof ones.
- 5. Extra thermal socks - I wore double layer of thermal socks but it doesn't seem as useful even if it is thermal because of the moisture. But, since it's very light and easy to bring better have more than less right?
- 6. Gloves - We brought construction worker gloves which didn't work. The gloves should be leather winter gloves because you don't need the extra layer. You need to keep your hands dry.
- 7. Bonnet/Head Gear/Scarf/Malong - I wore a knitted bonnet and winter knitted scarf.
- 8. Dry bags - The entire time including the hike up, I brought my 5L dry bag that contains all my gadgets especially my non-weather-sealed camera.
- 9. Hiking/camping bag or rucksack - I used a 36L Columbia hiking bag for women. Most of us carried a bag around 40L. Any brand with a back brace and a rain cover will suffice. It is also useful if it has strap belts on the side so you can strap in your long earth mats or sleeping bag that won't fit your bag. If you don't have straps, you can use carabiner hooks.
- 10. Sleeping Bag + Optional Emergency Thermal Blanket - Each sleeping bag has a comfortable or optimal temperature and limit temperature. I used a Navigator South sleeping bag with a thermal limit of 0 degrees. It was thick and warm but moisture still penetrated. Moisture or damp proof ones are very expensive. My friend used a 150 php sleeping bag from Basekamp which I noticed was a lot thinner. In case your sleeping bag isn't warm enough, you can supplement your sleeping bag with a Waterproof Emergency Thermal Blanket which you can buy for less than 100 php. There are also sleeping bags for rent for 200 php at the Ranger Station.
- 11. Earth/Camping/Sleeping mat/pad - This is very cheap to buy (around 150 php) and very light to carry around so it's ideal to bring. The insulated or aluminum foil ones are betteras they provide additional warmth. As cheap substitutes, you can use yoga mats. Recently, I also discovered an inflatable sleeping pad with pillow. You'd be posh with that. =p
- 12. Headlamp (with batteries that last around 6 hours) - Because our hands have to be free so we could climb, we opted for a LED headlight from Wyler Enterprises instead of flashlights.
- 13. Large Garbage Bags (at least 2 pcs.) + Garbage Clips - You can use garbage bags for your trash as they strictly implement that Leave No Trace Principle. It is also useful to waterproof your things.
- 14. Personal whistle (even if you're camping/hiking bag has a built-in one cause you will be leaving you're heavier load on the camp site)
- 14. Personal meds and First Aid Kit
- 15. Toiletries including alcohol and wet wipes - The Ranger Station has a restroom with water. At Camp 2, there is only an open pit with a wood to step on and around you for a bit of privacy. Better put your mask up!
- 16. Mess kit - We used take-out disposable plastic wares and plastic utensils. It's hassle-free as we just threw them after use and it spared us from dishwashing.
- 17. Personal trail food - We didn't have time to stop and eat so candies and nuts were eaten along the way.
- 18. Bottled water - You can purchase some at the Ranger Station
- 19. Camera - If you have a light weight tripod, you can even capture the constellations.
- 20. Trek pole (optional) - My friend says it helped her a lot.
- 21. Sunglasses
- 22. Shoes with traction - You'll be passing through rocks and mud.
- 22. Tent with rain cover - You can rent one for 300 php at the Ranger station. The one we rented is the X2 from Basekamp (worth 2,475 if you purchased one)
- 23. Medical certificate - There is now a medical certificate required before you take the climb because a 51-year-old tourist died of heart attack inside her tent on November 6. Bring a printed copy of medical clearance with the contact number and license number of your medical physician who issued it. If you have any conditions, further assessments will be required - such as to the heart (Electrocardiogram or ECG, kidneys, lungs and liver.
- 24. Oxycan (optional) - My cousin also brought an Oxycan which we passed on along if we're having difficulty in catching our breath.
If you have medical conditions , you cannot take this climb (even if you manage to get a medical certificate) because it gets cold and difficult to breathe as you go up. As long as you can walk for long hours you'll be fine with the Ambangeg trail. The trail is not so steep.
So that's it! You're ready for your Mt. Pulag Climb! Will post more on the details of our climb.
Related Posts
Mount Pulag DENR Registration: Hiker's Orientation
Camping at the Babadak Ranger Station: Sea of Clouds
Mount Pulag: Hike to the Summit (Peak 3) to Watch the Sunrise
Mount Pulag: Chasing the Sea of Clouds
Mount Pulag: Hiking Down Ambangeg Trail


.jpg)
